
Measure your shelves first, then zone by how often you reach for something, then close the gap between the two with pull-outs or long front-to-back bins wherever a shelf runs deeper than about 16 inches, and finish by labeling and rotating stock so the system holds. That single sequence, measure, zone, add access, label, solves most of what makes a deep pantry frustrating. The Kitchn shelf-depth guidance and Flawlessly Functional's own retrofit work both point to the same fix.
TL;DR:
- Shelves deeper than 16 inches create blind spots that require hardware like pull-outs or risers, especially for regularly used items.
- Accurate measurement of shelf depth, height, and width is essential before selecting containers or planning zone placement in a deep pantry.
- Proper zoning, with heavy items low and daily essentials at eye level, aligns storage with household habits to improve accessibility.
- A first-in, first-out system, using clear containers and inventory checks, prevents food waste and keeps the pantry organized.
- Professional retrofit services customize solutions for deep pantries, including precise measurements, built-in hardware, and consistent labeling.
Table of Contents
- How Do You Measure a Deep Pantry for Organization?
- What's the Best Way to Zone a Deep Pantry?
- Which Shelving Upgrades Actually Fix Deep-Shelf Blind Spots?
- What Containers Work Best in a Deep Pantry?
- How Do You Stock a Deep Pantry Without Wasting Food?
- How Often Should You Maintain a Deep Pantry System?
- How Do Professional Organizers Approach a Deep Pantry Retrofit?
- Why Most Pantry Advice Skips the Hard Part
- Ready for a Pantry That Stays Organized?
- Sources
- FAQ
How Do You Measure a Deep Pantry for Organization?
Grab a tape measure before you grab a single bin. Buying containers or shelving hardware before you know your actual dimensions is the most common, and most expensive, mistake in pantry organization tips you'll find online.
Start with shelf depth, front to back. This is the number that decides almost everything else about your layout. 12 to 16 inches is the sweet spot for a reach-in pantry shelf, according to The Kitchn's shelf-depth guidance. Anything beyond 16 inches creates a dead zone at the back where cans, boxes, and jars vanish from sight and stay there until they expire.
Pro Tip: Run a tape measure along three different shelves, not just one. Builders often taper pantry depth slightly from top to bottom, and a single measurement can leave you ordering bins that don't fit two shelves down.
Work through this checklist room by room, shelf by shelf:
- Depth, front to back, on every shelf (not just the top and bottom).
- Height between shelves, so you know if you have room for stackable canisters or risers.
- Width of each shelf run, especially where it narrows near a wall or corner.
- Door swing clearance, since a deep pantry with a hinged door often loses several inches of usable width to the door arc.
- Aisle clearance in front of the shelves, particularly for walk-in pantries where you need room to kneel or crouch at floor level.
By the numbers: Shelves deeper than 16 inches create accessibility blind spots that usually require pull-out shelves or drawers to fix, according to The Kitchn. If your tape measure reads higher than that on more than one shelf, plan for hardware, not just containers.
Once the dimensions are logged, take inventory of what actually lives in the pantry, especially appliances and bulk purchases. A stand mixer, a case of sparkling water, or a five-gallon bucket of rice needs a different kind of space than a spice jar does. Note which items are heavy, which are bulky, and which get used daily. That inventory becomes the raw material for the zoning plan in the next step, and it will tell you whether you actually need a dedicated appliance counter with outlets nearby, something design guidance on pantry layouts increasingly recommends for deep-shelf spaces instead of forcing everything onto one continuous depth.
What's the Best Way to Zone a Deep Pantry?
A deep pantry works when the layout matches how your household actually moves through the kitchen, not when every shelf holds the maximum possible volume. Zoning is what turns a deep closet full of food into a system you can navigate half asleep at 6 a.m.
The vertical hierarchy is simple and backed by how people actually reach for things. Store heavy items low to minimize hazards from lifting heavy objects at higher levels. Keep the things you grab daily, cereal, snacks, coffee, at waist to eye height, right in your natural sightline. Save the highest shelves for lightweight, seldom-used items like seasonal baking molds or the fondue set you use twice a year. The Kitchn's guidance on shelf placement backs up exactly this arrangement.
From there, map horizontal zones based on your inventory list:
- Grab-and-go zone near the door for snacks, granola bars, and anything kids or guests reach for without asking.
- Baking zone grouping flour, sugar, extracts, and mixes so a recipe doesn't send you hunting three shelves apart.
- Snack zone separate from baking, since snack traffic is constant and baking traffic is occasional.
- Bulk stock zone for the deepest, most awkward shelves, reserved for cases and multipacks that don't need daily access.
- Appliance counter zone, if your pantry is deep enough and wired for it, keeping small appliances off the floor and out of cabinet blind spots.
Corners and unusually narrow shelf runs deserve their own plan rather than an afterthought. A rotating carousel (a lazy susan, essentially) solves a blind pantry corner better than any bin can, since it brings the back of the space forward instead of asking you to reach into it. Alternatively, dedicate that corner to oils, vinegars, and condiments you use in small quantities, items where a little visual clutter doesn't cost you much. For very deep corner shelving, converting that run into a small appliance counter with an outlet nearby reduces the temptation to stack heavy items out of reach, a trick professional designers lean on more than most homeowners realize.
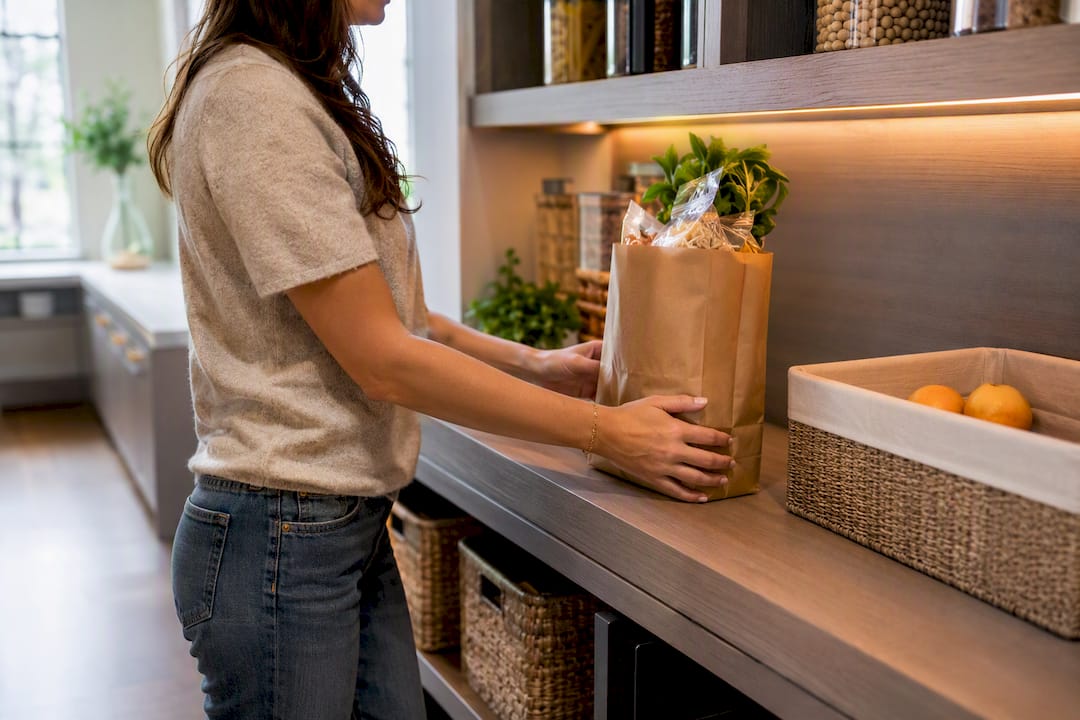
One more move that pays off immediately: designate a single "landing shelf" near the pantry entrance where grocery bags get unloaded before anything gets put away. Unpacking directly onto your zoned shelves means groceries get shoved wherever there's room, which undoes your zoning within a week. A landing shelf forces a pause, and that pause is where the system actually holds.
Which Shelving Upgrades Actually Fix Deep-Shelf Blind Spots?
Not every deep pantry needs carpentry. Some need $40 worth of bins. Knowing which situation you're in saves both money and wasted weekends.
Use this decision order before spending anything:
- Measure depth first. If every shelf falls under 16 inches, you likely don't need pull-outs at all, just better containers and zoning.
- Flag any shelf over 16 inches. These are your blind spots, and they're the ones that need hardware, not just bins.
- Check frequency and weight for those deep shelves. A deep shelf holding once-a-year holiday platters doesn't need a pull-out. A deep shelf holding daily canned goods does.
- Test cheap before you commit to expensive. A long, shallow bin pulled in and out by hand can act like a mock drawer for a few weeks, according to organizing guidance from Jessica Welling Interiors, proving the concept before you pay a carpenter to build the real thing.
- Install pull-outs only where the test confirms daily value. This keeps the retrofit focused on the shelves that actually earn the investment.
If the test confirms you need hardware, here's what's actually on the market and where each option fits:
- Full-extension pull-out shelves slide the entire shelf toward you on drawer slides, essentially turning a deep shelf into a shallow one on demand. Best for daily-use zones like canned goods or baking supplies.
- Roll-out drawers work similarly but with taller sides, better suited to loose items that would tip over on a flat pull-out.
- Adjustable shelving lets you change shelf height as your inventory shifts, useful in pantries that see seasonal swings in bulk buying.
- Tiered risers add a second visible layer to a single shelf without any carpentry, ideal for canned goods or spice jars.
- Over-the-door organizers claim otherwise wasted door space for small, lightweight items like packets and pouches.
- Can dispensers use gravity to feed canned goods forward automatically, which solves the "cans hiding at the back" problem without any mechanical parts.
- Lazy susans remain the single best fix for a blind corner, rotating the entire load into reach instead of asking you to dig.
If your deep pantry doubles as an appliance zone, check load ratings before mounting anything and confirm any outlet you're relying on is properly grounded and rated for continuous use, not just a lamp-duty circuit. A stand mixer or slow cooker sitting on a flimsy wire shelf is how shelving hardware fails. Adding motion-sensor LED strips along the shelf fronts at this stage also solves a problem hardware alone can't. Even a perfectly organized deep shelf is useless if you can't see what's on it, and task lighting cuts down on the "I bought another jar of cumin because I couldn't see the one I had" problem more than people expect.
What Containers Work Best in a Deep Pantry?
The container you choose determines whether a deep shelf becomes usable or just becomes hidden storage with better packaging. Get the sizing wrong and you've spent money creating the same blind spot you started with.
The core rule: choose long, front-to-back bins that fill the shelf's full usable depth wherever possible. A bin that only occupies the front third of a deep shelf leaves the back two-thirds just as inaccessible as it was with no container at all. Pair that with low sides, 4 to 6 inches is plenty for most dry goods and canned items, so you can see everything in the bin without pulling it all the way out.
Different food categories call for different container types:
- Clear canisters for dry goods like flour, rice, pasta, and cereal, since visibility and freshness both improve when you can see the contents and the seal keeps pests out.
- Rectangular stackable canisters for anything you're buying in bulk and want to compress vertically rather than spreading across shelf width.
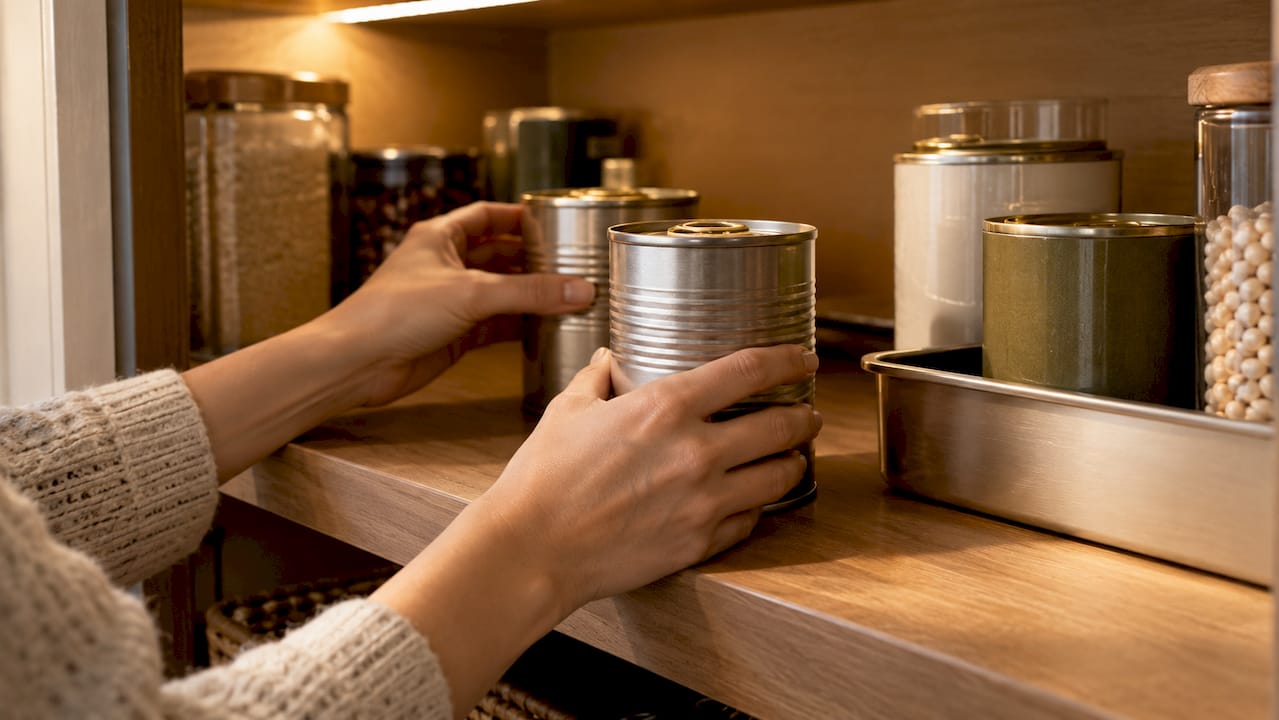
- Long, shallow bins for pantry rows of canned goods, sauces, or snack bags, pulled forward like a drawer.
- Can dispensers specifically for canned goods, letting gravity keep the oldest cans in front automatically.
- Modular drawer units for the bottom shelves, where heavier items and less frequently used stock belong anyway.
Homes & Gardens' guidance on organizing deep pantry shelves recommends decanting into clear jars or stackable containers specifically because it groups similar items and cuts down on duplicate purchases, a problem that gets worse, not better, the deeper your shelves are. Independent container testing from Serious Eats backs this up, favoring clear stackable options with reliable seals over generic tubs for keeping dry goods fresh.
Labeling matters more in a deep pantry than a shallow one, simply because more of your inventory sits out of direct eye contact. Use large, high-contrast labels on the front-facing side of every bin, not the top, since you'll almost never be looking down into a deep bin from above. Keep names simple: "pasta," not "penne, rigatoni, and assorted shapes." Decanting takes time up front, and that's the real tradeoff. You're spending ten minutes transferring bagged rice into a canister so that every future trip to that shelf takes ten seconds instead of two minutes of digging. It's rarely a bad trade.
One caution worth repeating: a container's capacity is a hard limit, not a guideline. Good Housekeeping's pantry organization coverage warns that professional organizers see overfilled bins become their own clutter problem, jammed lids, crushed boxes, items forced in sideways, more often than empty shelf space ever does. If a bin is full, that's a signal to start a new one or reassess the zone, not a reason to force in one more box.
How Do You Stock a Deep Pantry Without Wasting Food?
Good zoning and the right containers only solve half the problem. The other half is what happens every time you come home from the grocery store, and that's where most deep pantries quietly drift back into chaos.
Follow this restocking sequence after every grocery trip:
- Unload onto the landing shelf first, never straight into deep storage. This gives you a moment to sort before anything gets buried.
- Pull older stock forward on the relevant zone shelf before adding anything new behind it. This is first in, first out (FIFO) restocking, and it's the single biggest lever against food waste in a deep pantry.
- Check dates on anything moving to the back. A five-second glance at a "best by" date before it disappears behind newer stock saves you from finding a two-year-old can during your next purge.
- Decant what's shelf-stable into your clear containers immediately, rather than leaving bagged or boxed goods to pile up waiting for "later." Later rarely comes.
- Note anything nearing its expiration date on a small chalkboard or whiteboard near the pantry entrance, so it gets used before it gets wasted.
Decanting earns its keep here in a way that's easy to underestimate. When rice, flour, or dried beans sit in their original opaque bags, you genuinely can't tell how much you have left without opening and checking manually, which is exactly the kind of friction that leads to buying a third bag of something you already own two of. Clear containers turn that guesswork into a glance.
The habit that makes FIFO stick is small: every time you reach for an item, notice whether there's an older version of it sitting further back. Move it forward. This takes seconds and prevents the classic deep-pantry failure where the newest can always gets grabbed first and the oldest one sits untouched until it's expired.
How Often Should You Maintain a Deep Pantry System?
Even a well-designed deep pantry organization system erodes without upkeep. Professional organizers call the slow creep of stray items back into pantry shelves "drift," and it's less a failure of your system than a predictable pattern that needs to be scheduled for, not just hoped away.
Build maintenance into two recurring habits:
- Monthly, 5 to 10 minutes: scan every shelf, check what's low, and glance at near-expiry items flagged on your whiteboard.
- Quarterly, closer to 30 minutes: pull everything forward, check for expired goods, and remove anything that's drifted in that doesn't belong, holiday decorations, random tools, kids' art supplies.
Mother Earth News's reporting on deep pantry organization treats this drift as a near-universal pattern in busy households, which is exactly why a scheduled purge belongs in the design of the system itself rather than as optional housekeeping you get to eventually.
Pro Tip: Assign each family member one zone they're responsible for restocking, even kids can own the snack zone. A two-minute "put it back where it lives" expectation after unpacking groceries does more for long-term maintenance than any container ever will.
How Do Professional Organizers Approach a Deep Pantry Retrofit?
A professional retrofit follows the same sequence covered above, measure, zone, add access, label, but with more precision at each step and access to custom carpentry most homeowners can't source or install themselves.
When a professional scopes a deep pantry project, the process typically includes:
- A full site measurement of every shelf, not a spot check, since even a quarter inch of variance changes which bins or pull-outs will actually fit.
- A load check on existing shelving before adding weight, particularly in older homes where pantry shelving wasn't built for today's bulk-buying habits.
- Custom pull-out design sized to the exact depth of each problem shelf, rather than a generic off-the-shelf slide that leaves gaps.
- Container selection matched to household volume, not just aesthetics, so bins hold a realistic week or two of stock without inviting overfilling.
- A labeling standard applied consistently across the whole pantry, so the system reads the same way on shelf three as it does on shelf one.
A DIY approach handles most single-shelf fixes well. Hiring a pro tends to make more sense when a project involves built-in cabinetry, electrical work for an appliance counter, or a tight moving timeline where there simply isn't time to test bins for a few weeks before committing. Flawlessly Functional's organizing services are built around exactly that kind of complexity.
Why Most Pantry Advice Skips the Hard Part
Most pantry content sells you on containers. Buy the right jars, the advice goes, and the clutter disappears. That's backwards. A closet full of beautiful clear canisters arranged on a 22 inch deep shelf is still a closet where the back third of every shelf is functionally dead space. Containers organize what you can already reach. They do nothing for what you can't.
The measurement step gets skipped constantly, and it's the one step that actually determines whether you need $30 in bins or a carpenter. I'd argue the 16 inch threshold The Kitchn points to deserves more attention than it gets, because it's the line between a problem you can solve this weekend and one that needs real hardware.
If you take one thing from all of this, prioritize access over aesthetics. A slightly ugly pull-out bin you can see into beats a gorgeous canister system sitting behind a foot of dead space. Fix visibility first. The pretty part comes easily once you can actually reach everything you own.
— Steve
Ready for a Pantry That Stays Organized?
Every step above works, if you have the weekends, the tools, and the patience to test bins before committing to carpentry. Not everyone does. Flawlessly Functional exists for exactly that gap: instead of spending three Saturdays measuring, testing mock pull-outs, and second-guessing container sizes, you get a custom pantry system, measured, zoned, and built out, in a single scoped project.

The organizing services at Flawlessly Functional cover exactly what this guide walked through: shelf measurement, zoning by frequency, custom pull-out and container selection, and a labeling standard that holds up over time, all tailored to how your household actually cooks and shops. If you're mid-move, the moving concierge services fold pantry setup directly into your unpacking, so the new kitchen works from day one rather than becoming next year's project. And if you're weighing the investment, why luxury organizing is about experience, not speed explains the difference between a rushed weekend fix and a system built to last.
If you'd rather try the DIY route first, everything above still applies. When you're ready for a professional finish, book a consultation and we'll take it from there.
Sources
- The ideal measurements for your pantry shelves — The Kitchn
- How to organize deep pantry shelves — Homes & Gardens
- Best pantry organization ideas — Good Housekeeping
FAQ
What is the best way to organize a deep pantry?
Measure every shelf's depth first, then zone items by frequency of use, add pull-out shelves or long front-to-back bins wherever a shelf exceeds 16 inches, and finish with clear labeling and a FIFO restocking habit.
How do I organize kitchen cabinets that are deep?
Apply the same fix used for deep pantry shelves: pull the contents forward with long bins or a lazy susan for corners, put heavy items low and daily items at eye level, and reserve the deepest, hardest-to-reach spots for bulky items you rarely need.
How do I store canned goods in a deep pantry?
Use a gravity-fed can dispenser or a shallow, front-to-back bin so older cans are pushed to the front automatically, which naturally enforces first in, first out rotation without any extra effort.
How do I organize a very large pantry?
Treat a large deep pantry as several smaller zones rather than one big space: a grab-and-go area, a baking zone, a bulk stock section, and possibly an appliance counter, each measured and fitted with containers sized to that zone's specific traffic and weight.