
Pack your kitchen in phases: nonessentials go first, three to four weeks out, and daily items get boxed last. Keep one open-first essentials box with you instead of on the truck. Start today by gathering dish-pack boxes, packing paper, and a cell kit for glassware, then set aside a box for the items you'll need the moment you walk into the new house. If you'd rather skip the labor entirely, a professional concierge service can handle the whole process.
TL;DR:
- Proper boxes and cushioning are crucial, with dish-pack boxes, cell dividers, and reinforced bottom tape preventing damage to fragile kitchen items.
- Wrap each plate on edge and pack glasses rim-down in individual cells to avoid chips and breakage during transit.
- Disassemble furniture like tables and shelves, securing hardware in labeled bags, and photograph complex assemblies for easier reassembly.
- Coordinate utility disconnections for appliances in advance, defrosting refrigerators and scheduling professional disconnects to prevent damage or delays.
- Use a dedicated open-first essentials box containing basic items for immediate use upon arrival, and prioritize unpacking it before other boxes to settle into your new kitchen quickly.
Table of Contents
- Packing Supplies and Box Types for Packing a Kitchen for a Move
- How Do You Pack Plates, Glasses, and Stemware?
- Packing Cookware, Lids, and Small Appliances
- Sorting the Pantry Before You Pack a Single Can
- Knife Safety and What Movers Won't Take
- Labeling and the Open-First Essentials Box
- What to Unpack First on Arrival Day
- How to Pack Small Kitchen Gadgets and Utensils
- Packing Glassware Beyond Standard Plates and Cups
- Disassembling Kitchen Furniture and Shelving
- Moving Large Appliances and Coordinating Utility Disconnects
- Cleaning Kitchen Items Before You Pack Them
- Keeping Food Safe During a Kitchen Move
- When a Concierge Packing Service Makes More Sense Than DIY
- Let Flawlessly Functional Handle the Packing While You Handle Everything Else
- Sources
- FAQ
Packing Supplies and Box Types for Packing a Kitchen for a Move
The kitchen is where boxes fail most often, usually because someone grabbed whatever was free instead of matching the box to the load. Cardboard collapses under mismatched weight, and paper towel wrapping is no substitute for a real cell kit.
Here's what actually holds up, based on standards professional movers use:
- Dish-pack (double-walled) boxes for plates, bowls, and platters. The double wall resists crushing in a stacked truck.
- Cell dividers or cell kits for glasses and stemware, so each piece rides in its own compartment.
- Small boxes for anything heavy and dense, like canned goods or cast iron skillets, where weight matters more than volume.
- Medium boxes for small appliances and everyday cookware.
- Large boxes for lightweight, bulky items like mixing bowls or a stack of dish towels.
- Unprinted packing paper for wrapping, plus bubble wrap for anything with a delicate edge.
- Tape reinforced with the H-method across the bottom seams, since a single strip down the middle is where boxes split open.
- Knife guards, markers, and stretch wrap round out the kit.
For an average family kitchen, plan on several dish-pack boxes, a few cell kits, multiple small and medium boxes, and some large ones. U-Haul's packing guide recommends exactly this kind of tiered approach, plus Enviro-Bubble for anything with a curved or irregular surface that paper alone won't cushion.
How Do You Pack Plates, Glasses, and Stemware?
Chipped plates and shattered stemware are the two most common casualties of a kitchen move, and both come down to orientation and cushioning, not luck.
- Wrap each plate individually in packing paper, then stand the stack on its edge inside the dish-pack box, never flat. Plates stacked flat absorb shock straight down through the pile; on edge, they flex like a shock absorber.
- For everyday plates you're not worried about, you can bundle three or four together after wrapping, but keep bundles small.
- Slide glasses into individual cells inside a cell divider kit. This is the single biggest upgrade over generic wrapping, according to Move, which recommends double-walled dish-pack boxes with cardboard cell dividers specifically to stop glass-on-glass contact.
- Pack stemware rim-down, since the base is sturdier than the delicate bowl of the glass, and stuff paper into the stem and bowl for internal support before wrapping.
- Keep any box holding fragile items under roughly 30 pounds. Professional movers surveyed by America's Test Kitchen point to overloaded fragile boxes as one of the top causes of in-transit breakage, since a heavy box gets tossed around the same way a light one does.
- Label "fragile" and "this side up" on at least three faces of the box, not just the top, since boxes get stacked and rotated during loading.
Pro Tip: Fill every gap inside a dish-pack box with crumpled paper before you close it. A box that rattles when you shake it gently is a box that will arrive with broken pieces.
Packing Cookware, Lids, and Small Appliances
Pots and pans nest well, but only if you separate the surfaces. Slide a sheet of packing paper between each pan before stacking them inside a medium box, and never let a metal pan sit directly against a nonstick coating. That contact is what causes scratches that ruin a nonstick pan long before it wears out naturally.
- Pack lids on their own, either standing upright along the box wall or padded flat between towels.
- Put cast iron in small boxes only. A large box loaded with cast iron becomes too heavy to lift safely and too heavy for the cardboard to support.
- Pad cast iron with dish towels or paper rather than bubble wrap, since the weight will flatten thin padding anyway.
- Remove blades, beaters, and other attachments from mixers and blenders, and secure loose cords with a twist tie or rubber band.
- Use original manufacturer boxes for appliances if you kept them. They're built to that exact shape and cushion better than anything generic.
- Reinforce every box bottom with the H-tape method and distribute weight so heavier items sit low, closer to the bottom of the box, which keeps the box stable when movers tilt or stack it.
Sorting the Pantry Before You Pack a Single Can
Most kitchens carry more pantry weight than people realize, and moving all of it is usually a waste of boxes and money. Sort everything into three piles: what you'll actually move, what you'll use up before the move, and what gets donated.
- Plan meals around perishables in the final two weeks so you're not tossing food on move day.
- Pack canned goods in small boxes only. Cans are dense, and a medium or large box loaded with them becomes nearly impossible to carry safely.
- Transfer opened dry goods, like flour or cereal, into sealed bags before boxing them, a step The Spruce's kitchen packing guide calls out specifically to prevent spills.
- Wrap bottle caps in plastic wrap, then tape over that, to stop leaks from oils, vinegars, and sauces during the jostling of transport.
- For expensive specialty bottles like aged olive oil or truffle oil, weigh the cost of replacing them against the risk of a cracked bottle ruining everything else in the box.
- Movers typically won't transport flammables, propane tanks, or certain aerosol cleaners, so plan to use those up or dispose of them properly before moving day.
Knife Safety and What Movers Won't Take
Never drop loose knives into a box. A blade shifting during transit is a real cutting hazard for whoever opens that box next, whether that's you or a mover. Slide each blade into a knife guard, or fashion a sheath from folded, taped cardboard. If you're moving a knife block, wrap the whole block with the knives still seated inside, then tape it shut. Bundle sharp items together in one clearly labeled box, marked on multiple sides.
Beyond knives, certain household items don't travel on a moving truck at all: flammable cleaners, propane canisters, and some aerosols fall under standard mover exclusions. Plan to transport those yourself or dispose of them before the crew arrives.
Labeling and the Open-First Essentials Box
A labeling system only works if it's fast to read under bad lighting in a new kitchen at 9 p.m. Label the top and one side of every box with the room name and a short contents note, not a full inventory. Mark fragile boxes and this-side-up boxes on at least three faces.
For inventory, skip the detailed spreadsheet and use shorthand instead: a box number plus a two or three word contents tag ("Box 12, mugs/glasses") is faster to scan than a paragraph.
One packing framework built around timing recommends packing nonessentials three to four weeks before moving day, then finishing with a designated open-first box packed last. That box should include:
- Coffee or tea gear, including filters and a mug
- One pot and one pan
- A spatula and a couple of basic utensils
- A few plates, bowls, and cups for the first meal
- Basic cutlery
- Dish soap and a sponge
- Hand towels or paper towels
- Trash bags
Keep this box in your car, not on the moving truck. If it rides with the truck, you're stuck digging through unlabeled boxes on your first night in a new place.
What to Unpack First on Arrival Day
Unpack the essentials box before anything else, then set up a basic coffee or meal station so the kitchen feels functional within the first hour. Get major appliances into position next, since they're heaviest and easiest to place before other boxes crowd the floor.
Open fragile boxes near a table, not on the counter, so anything that shifts during transit has a soft landing if it slips from your hands. Check dishes and glassware for cracks as you unpack them, and if movers caused any damage, document it and file a claim immediately rather than waiting.
Hold off plugging in certain appliances, particularly refrigerators that were transported on their side, until you've checked the manufacturer's manual. Some units need to sit upright for several hours before running to let refrigerant settle.
How to Pack Small Kitchen Gadgets and Utensils
Small items are where kitchen boxes turn into chaos, because a drawer full of loose gadgets doesn't have an obvious container the way plates or pots do. The fix is grouping by function rather than by drawer.
Wrap utensil crocks and drawer organizers as units when possible, keeping spoons, spatulas, and tongs together in one bundle secured with a rubber band before wrapping. For small electric gadgets like immersion blenders, can openers, or coffee grinders, wrap the body separately from any blades or attachments, and tape loose parts to the main unit so nothing goes missing.
Fill a medium box with these smaller items rather than a large one. A large box invites people to keep adding random items until it's overloaded and hard to lift.
Use crumpled paper to fill dead space between gadgets so nothing shifts and knocks against something else during transit. Items with cords, like electric can openers, should have cords wrapped and secured with a twist tie so they don't tangle with anything else in the box.
Label this box specifically, something like "Kitchen: gadgets and utensils," rather than a generic "Kitchen misc." label. Generic labels are the reason people end up opening six boxes looking for a can opener on the first night.
Packing Glassware Beyond Standard Plates and Cups
Measuring cups, delicate bakeware, and oddly shaped glass items don't fit neatly into a standard dish-pack routine, and they get damaged more often than people expect because of that mismatch.
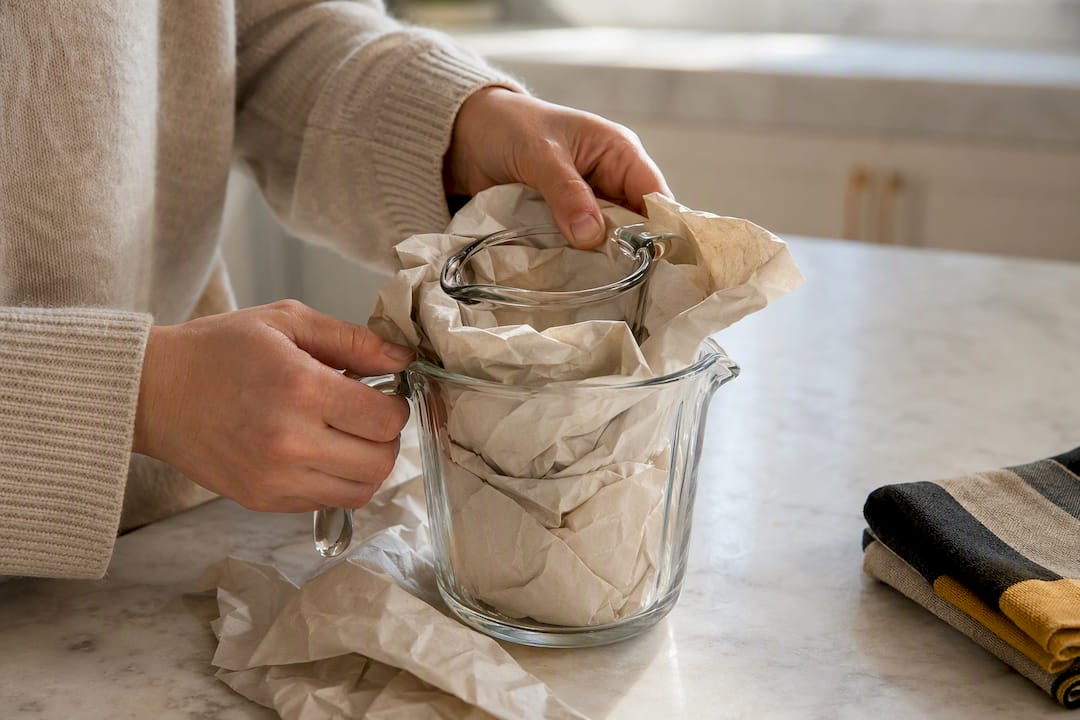
Glass measuring cups should get wrapped individually in packing paper, with extra padding around the pour spout and handle, since those thin, protruding parts are the first thing to crack under pressure. Nest smaller measuring cups inside larger ones with a layer of paper between each, then wrap the nested set as a single unit.
Glass bakeware, like casserole dishes or pie plates, needs to stand on edge rather than lie flat whenever the shape allows it, the same principle that protects plates. Wrap each piece fully, then use a dish-pack box with dividers if you have several pieces of similar size. For a single large glass baking dish, wrap it heavily and place it on top of a box of soft items like towels, never at the bottom under heavier cookware.
Cake stands, glass mixing bowls, and decorative serving pieces need extra attention around any thin rim or foot. Wrap the base separately from the bowl of the piece, then reassemble the wrapped components together so the padding stays where the stress concentrates. Keep all of these pieces in boxes marked fragile, and don't mix them into a box with heavier, non-fragile kitchen items where the weight differential can crush the glass from above.
Disassembling Kitchen Furniture and Shelving
Kitchen tables, bar stools, and freestanding shelving units usually need at least partial disassembly before a move, both to protect the furniture and to make it fit through doorways.
Start by removing table legs if they're bolted on, keeping every bolt, washer, and screw in a labeled plastic bag taped directly to the underside of the tabletop. This single habit prevents the single most common furniture-move problem: reassembling a table at the new house with mismatched or missing hardware.
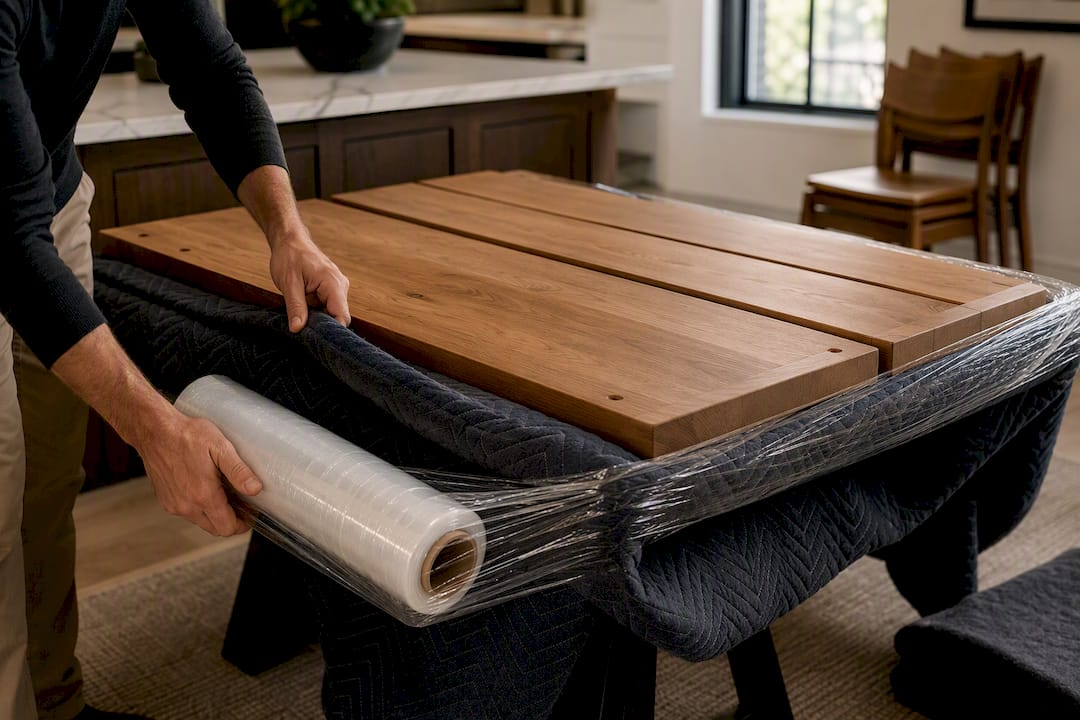
Wrap tabletops in moving blankets or thick padding, securing with stretch wrap rather than tape directly on the wood or laminate surface, since tape adhesive can pull off finish. Chairs typically don't need disassembly, but stack them seat-to-seat with a blanket between to prevent scuffing, and wrap any exposed legs.
Freestanding kitchen shelving, like a baker's rack or open pantry shelf unit, should be emptied completely before you attempt to move it. Remove shelves if they're removable, wrap each one individually, and keep the frame's hardware bagged and labeled the same way as the table. If the unit doesn't disassemble, wrap it fully in moving blankets and secure with stretch wrap rather than tape.
Photograph any complex assembly before you take it apart. A quick photo on your phone saves real frustration when you're reassembling a shelving unit weeks later and can't remember which bracket went where.
Moving Large Appliances and Coordinating Utility Disconnects
Refrigerators, ovens, and dishwashers require planning that starts well before moving day, mostly around utility disconnection and appliance prep.
Defrost and clean the refrigerator at least 24 hours before the move, leaving the door propped open during transport to prevent mold from developing in the sealed, humid interior. Empty the ice maker and water lines completely, since trapped water can leak or freeze during transit depending on the season.
Gas ranges and ovens need a professional disconnect from the gas line before moving day. This isn't a DIY step. Contact your gas utility provider to schedule a technician, and coordinate the timing so the disconnect happens close to your move date rather than days in advance, which would leave you without cooking capability.
Electric appliances need their power cords secured and, where possible, any racks, shelves, or drawers removed and packed separately to prevent them from sliding and cracking glass shelving inside the appliance during transport. Tape or wrap doors shut so they don't swing open and catch on doorframes.
Schedule utility disconnection and reconnection at both properties in advance. A refrigerator or oven that arrives before the new home's gas or water line is active becomes a logistics problem rather than a kitchen appliance, so timing this with your utility provider ahead of the move avoids a stretch of days without a functional kitchen.
Cleaning Kitchen Items Before You Pack Them
Packing dirty dishes or greasy cookware isn't just unpleasant to unpack later. It actively invites pests into sealed boxes that might sit in a truck or storage unit for days.
Wash and fully dry every dish, pot, and utensil before wrapping it. Any residual moisture trapped inside a sealed box with packing paper creates a breeding ground for mold, especially if the move involves any time in storage.
Wipe down the interior and exterior of small appliances, particularly anything that processes food, like blenders, toasters, and coffee makers. Crumb trays in toasters are a common overlooked spot where pests find their way into an otherwise clean kitchen.
Clean out the refrigerator and pantry shelves completely, removing crumbs, spills, and expired items before the move rather than after. A pantry shelf wiped down before packing means you're not accidentally boxing up food residue that attracts insects during transit.
Give cutting boards and wooden utensils extra attention, since porous surfaces hold onto moisture and food particles more than glass or metal. Let them air dry completely before wrapping, and avoid sealing them in plastic, which traps any remaining dampness against the wood.
Keeping Food Safe During a Kitchen Move
Food safety during a move comes down to temperature control and timing, the same two factors that matter in everyday kitchen safety.
Perishable and refrigerated items need a plan for the gap between leaving one kitchen and setting up the next. A cooler with ice packs handles a same-day, local move, but for anything longer, plan to use up refrigerated food beforehand rather than risk it sitting at unsafe temperatures for hours.
Frozen food follows a similar rule. If the move is under a few hours and you have a well-insulated cooler, frozen items can often survive the trip, but longer moves call for eating down the freezer stock in the final weeks rather than gambling on food safety.
Pack pantry staples and canned goods normally, since shelf-stable food doesn't carry the same time-sensitive risk. But avoid packing opened boxes of perishable dry goods, like opened crackers or cereal, in the same box as cleaning supplies or anything with a strong odor, since porous food packaging absorbs smells easily.
On arrival, get the refrigerator running as soon as utilities allow, and don't restock it with perishables until it's reached a safe temperature, which typically takes a few hours after a long transport.
When a Concierge Packing Service Makes More Sense Than DIY
Not every move calls for doing it yourself, and pretending otherwise wastes time you don't have. If you're managing a tight closing date, a kitchen full of inherited china or a wine collection, or staging a home for sale while still living in it, a concierge team changes the math.
A professional service can handle the packing, source the right materials for your belongings, maintain a working inventory, and unpack and organize the new kitchen so it functions from day one. That last piece, an organized home from the start, is where most DIY moves fall short even when the packing itself went fine.
— Steve
Let Flawlessly Functional Handle the Packing While You Handle Everything Else
A professional packing team can be an alternative to spending your last weeks before closing wrapped in packing paper instead of handling the hundred other things a move demands. Such a team might pack your kitchen onsite using professional-grade materials matched to what you own, keep a working inventory as the process goes, and unpack everything at the new house so your cabinets are functional again quickly, not weeks later.

DIY packing makes sense when you have time and a straightforward kitchen. It makes less sense when you're juggling a closing date, a fragile collection, or a house that needs to look staged while you're still living in it. If any of that sounds familiar, book a consultation for moving and packing services and find out what a concierge move actually looks like in San Antonio.
Sources
- Move
- The Spruce — How to easily pack the kitchen
- U-Haul — How to pack a kitchen for moving
- America's Test Kitchen — A professional mover's guide to packing your kitchen
FAQ
What is the hardest room to pack when moving?
The kitchen is widely considered the hardest room, since it combines fragile items, heavy items, and daily-use essentials that all need different packing approaches within the same space.
How long should you start packing before you move?
Start packing nonessential kitchen items three to four weeks before moving day, saving daily-use items for the final days so the kitchen stays functional until you leave.
What items will movers not pack or transport?
Standard movers typically won't transport flammable liquids, propane tanks, and certain aerosol cleaners, so plan to use these up, dispose of them, or transport them yourself.
What should you not pack when moving out of a kitchen?
Skip packing perishable food you can use up beforehand, opened liquids without sealed caps, and hazardous cleaning products that movers won't transport anyway.
Is it worth hiring someone to pack a kitchen?
For homeowners short on time, managing fragile or valuable kitchenware, or staging a home for sale, a concierge service like Flawlessly Functional's moving support often saves more stress than it costs.