
The single most important move before you list: book a pre-listing inspection this week. Pair it with decluttering and scheduling your staging or photography, and you've covered the three tasks that matter most in the first seven days. Give yourself 4 to 6 weeks total, following the sequence of inspection, then high-ROI fixes, then declutter and deep clean, then staging and photos.
TL;DR:
- Book a pre-listing inspection early, ideally 4 to 6 weeks before listing, to control repair costs and streamline negotiations.
- Prioritize fixing minor, quick, and low-cost repairs in key areas like kitchens and bedrooms to boost perceived value without overspending.
- Gather all necessary documentation, including permits and service records, at least 4 to 6 weeks before listing to avoid closing delays.
- Complete decluttering and deep cleaning before staging and photography, ensuring each step follows a logical sequence for better presentation.
- Spend 1 to 3% of the expected sale price on pre-listing preparations, focusing on decluttering, cleaning, and staging rather than costly renovations.
Table of Contents
- Pre-Listing Checklist Timeline: What to Do and When
- High-ROI Repairs and Staging That Actually Move Offers
- Paperwork and the Pre-Listing Inspection
- Open House and Showing Day: The Final-Hour Checklist
- Budget, ROI, and a Quick Checklist to Screenshot
- What I've Learned Watching Sellers Get This Wrong
- Let Flawlessly Functional Handle the Prep While You Handle the Sale
- Sources
Pre-Listing Checklist Timeline: What to Do and When
A pre-listing checklist only works if it's tied to a calendar. Sellers who start preparation several weeks before listing give themselves enough runway to fix problems without scrambling the week before photos. Homes with major projects (a roof, a kitchen refresh) benefit from starting much earlier, since early preparation of 60 to 90 days tends to produce better outcomes than a rushed month.
Here's how the work breaks down by how far out you are from your target list date:
- 8 to 6 weeks out: Research comparable sales, interview two or three agents, schedule your pre-listing inspection, and start any major repair that needs lead time, like roofing or foundation work.
- 4 weeks out: Knock out minor repairs, start decluttering room by room, consider renting storage, book your stager and photographer, and tackle curb appeal.
- 2 weeks out: Finish staging, do a full deep clean, gather your paperwork, and assemble the buyer document packet as available.
- 1 week out: Walk through the home as if you were a buyer, prep for photography day, and confirm your marketing plan.
- Listing day: Open the blinds, set a comfortable temperature, turn on lights, and leave the house before showings.
That sequence matters more than the exact dates. Repairs come before cosmetics because a cracked window or a running toilet undercuts a buyer's trust in everything else you show them.
High-ROI Repairs and Staging That Actually Move Offers
Not every fix deserves your time before listing. A useful rule of thumb: tackle minor repairs that are quick and low-cost first because buyers read small unfixed items as a sign of bigger neglect they haven't found yet. A loose cabinet handle or a burnt-out bulb costs you almost nothing to fix and costs you real money if a buyer notices it and starts wondering what else you skipped.
Focus your energy on:
- Kitchens and primary bedrooms, since these are the rooms buyers judge fastest.
- Neutral paint over anything bold or dated.
- Lighting upgrades, especially swapping warm yellow bulbs for brighter, whiter ones.
- Furniture layout adjustments that open up walking paths and make rooms read larger.
Staging pays off in a measurable way. Agents surveyed by the National Association of Realtors have reported that staged homes tend to draw higher dollar offers and spend less time on market than unstaged competitors. If your home is a light DIY project, you can handle small staging tweaks yourself. If it's a full house with mismatched furniture or an awkward layout, a professional stager earns their fee back multiple times over, particularly for interior styling and staging aimed at photo day specifically.
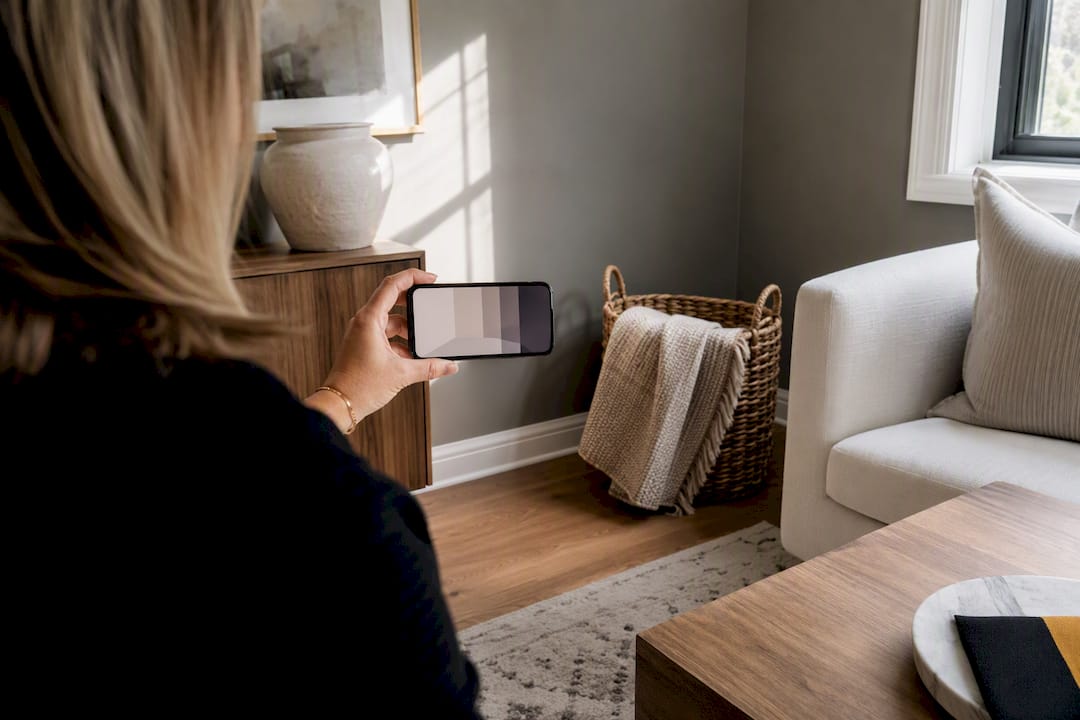
Pro Tip: Take your own phone photos of each room before you call a professional photographer. If a room looks cluttered or awkward in your own snapshot, it will look worse under a wide-angle lens.
Paperwork and the Pre-Listing Inspection
Buyers expect a document trail, and gathering it late is one of the more common reasons closings stall. Documentation issues around title and property identity cause a meaningful share of closing delays, so start collecting these 4 to 6 weeks out, not the week you go live.
- Pull appliance manuals and warranties, plus HVAC and roof service records.
- Gather permits for any past renovation work.
- Print recent utility bills and, if applicable, HOA disclosures and rules.
- Locate your title documents and any survey paperwork.
A pre-listing inspection typically costs roughly $300 to $600 and gives you something a buyer's inspection can't: control. Ordering your own inspection means you choose your contractor, your timeline, and your repair priorities, rather than reacting to a buyer's inspector's findings under deadline pressure. That control tends to reduce total repair costs and cuts down on renegotiation risk compared to waiting. Include your inspection report and repair receipts in your listing packet. Buyers who see documented, professional fixes negotiate less aggressively than buyers guessing at what's been hidden.
Open House and Showing Day: The Final-Hour Checklist
The morning of a showing or open house is not the time to discover a task you forgot. Work through this short list an hour before anyone arrives:
- Air out the house, especially kitchens and bathrooms.
- Set the thermostat to a comfortable, neutral temperature.
- Turn on every light, even during daylight hours.
- Remove pets, pet bowls, and litter boxes from the property.
- Lock away jewelry, prescriptions, and any valuables out of sight.
Redfin's open house research points to the same core formula: deep clean, remove personal clutter, maximize natural light, and keep the atmosphere neutral rather than heavily personalized. Leave the home during showings. Buyers talk more freely and stay longer when the seller isn't standing in the room. Set out a printed feature sheet, and keep a contact list of your contractors handy in case a buyer's agent asks about recent work.
Pro Tip: If you've already started packing, don't let boxes sit in view. Move them to a storage unit or garage before the first showing; stacked boxes read as clutter, not progress, to a buyer walking through.

Budget, ROI, and a Quick Checklist to Screenshot
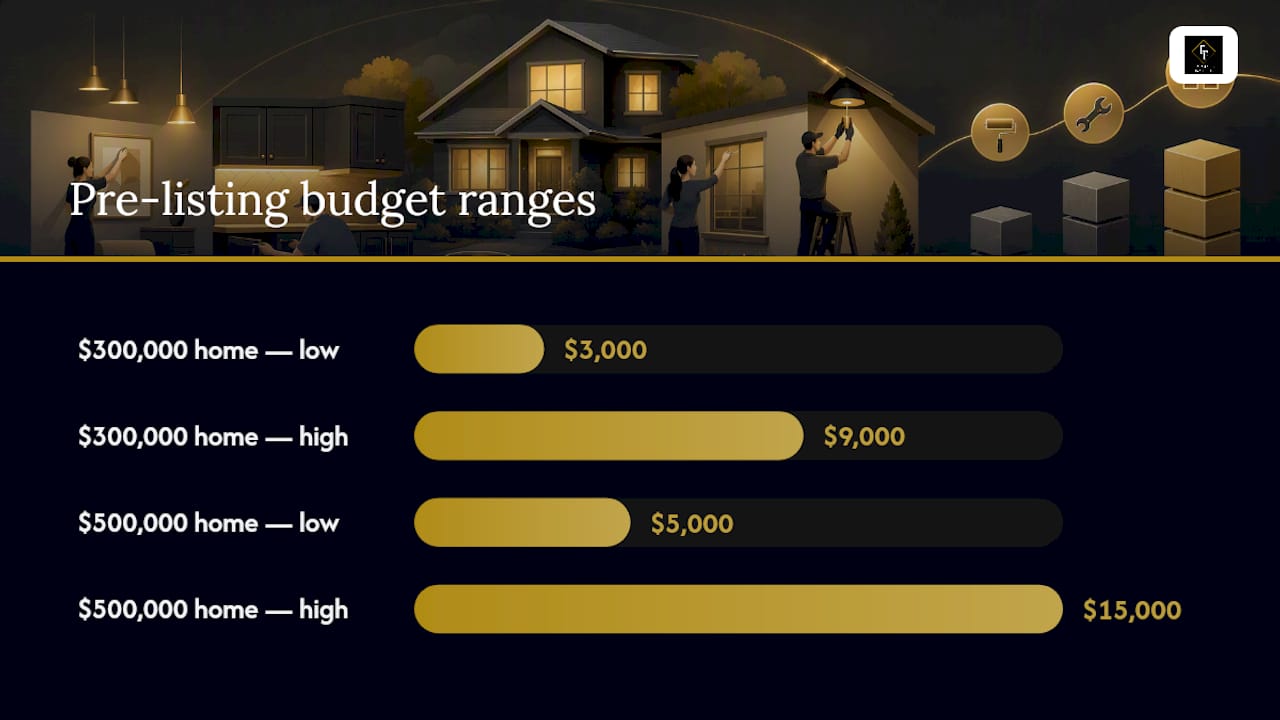
Plan to spend 1 to 3% of your expected list price on pre-listing prep. On a $300,000 home, that's roughly $3,000 to $9,000; on a $500,000 home, closer to $5,000 to $15,000. That range typically covers cleaning, minor repairs, staging, and photography.
Skip late-stage renovations. Sellers who focus on decluttering, deep cleaning, and curb appeal within a compressed timeline capture most of the available upside without overspending on updates a buyer might redo anyway.
Quick reference:
- Book a pre-listing inspection ($300 to $600).
- Fix anything under $200 and two hours first.
- Declutter, then deep clean, then stage.
- Gather paperwork 4 to 6 weeks out.
- Budget 1 to 3% of list price overall.
What I've Learned Watching Sellers Get This Wrong
Most sellers don't fail at the big, obvious tasks. They fail at sequencing. They stage a room before fixing the leaky faucet in it, or they schedule photography before the decluttering is even half done, and then they wonder why the listing photos feel off. The order matters as much as the tasks themselves.
. What I've seen work consistently is treating decluttering as its own project phase, not an afterthought squeezed in before photos. A home that's been properly cleared out, not just tidied for an hour, photographs differently and shows differently..
If you're managing a move alongside a sale, the emotional weight of a disorganized home compounds fast. Sellers underestimate how much stress comes from packing and staging at the same time.
Pro Tip: Pack out-of-season items first. It clears visible clutter immediately and you won't need those boxes again before closing.
— Steve
Let Flawlessly Functional Handle the Prep While You Handle the Sale
Flawlessly Functional is the alternative to juggling contractors, storage units, and staging vendors yourself while you're also trying to sell a house. Instead of coordinating five separate services, San Antonio sellers get one team handling the decluttering, the staging, and the move out, all timed to your listing date.

Our luxury home organizing services clear out and systematize a home so it photographs and shows the way buyers respond to, and our concierge moving management coordinates packing and transport so you're not living out of boxes while showings are happening. For sellers who want the staging itself handled, our interior styling and staging work turns the checklist above into a finished, photo-ready home without you sourcing furniture or paint colors on your own.
Reach out through Flawlessly Functional to get a walkthrough scheduled and a plan built around your actual listing date, not a generic timeline.
Sources
- How to prepare your house for sale — Opendoor
- Ready to Sell Your Home? Your 2026 Checklist — iBuyer
- Realtor
- Open house checklist for sellers — Redfin