
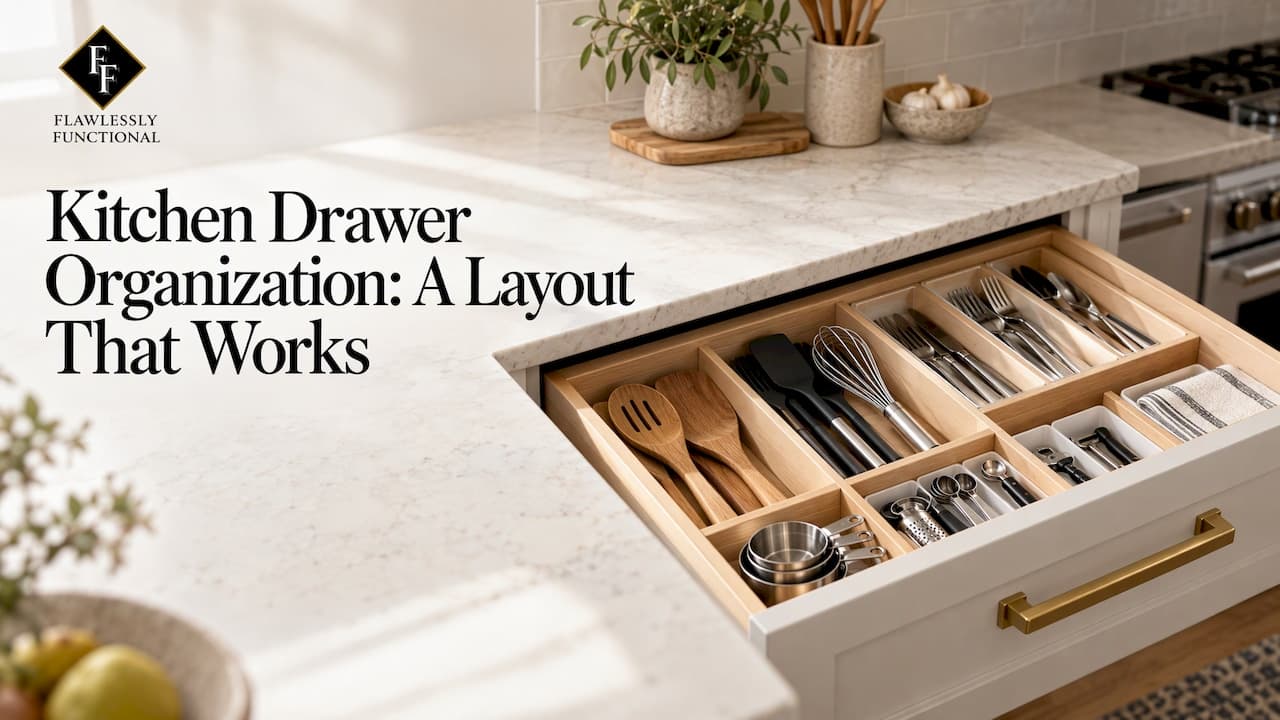
The fastest way to organize kitchen drawers is to empty every one of them, edit what comes out, and assign what is left to the drawer closest to where you use it. Organizers come last. When you buy dividers before you know the layout, you end up with trays that fit the drawer but not your life.
This guide walks through the full process: the edit, the zones, and the specific drawers people ask about most (utensils, spices, deep drawers and the junk drawer). It also covers how to choose inserts that stay put and how to make the system hold for years.
TL;DR
- Empty all the drawers in one session, group everything by task, and remove duplicates, broken tools and anything you have not used in a long time.
- Place items by use: flatware on the route to the table, spatulas and tongs beside the stove, everyday tools in the top or front drawers.
- Choose organizers after the layout is clear, and measure each drawer first. Use one-piece trays for standard flatware drawers and adjustable parts for odd sizes.
- Divide deep drawers lengthwise and spread the weight so they open and close easily.
- Label sections. A system that others in the house can read is a system that lasts.
Table of Contents
- Start by emptying everything and editing hard
- Group by task, then assign each group a drawer
- Utensil drawer organization
- Spice drawer organization
- Deep drawers: divide lengthwise and watch the weight
- The kitchen junk drawer
- Choosing organizers that fit
- How to keep drawers organized
- Let us handle the kitchen for you
- FAQ
- Sources
Start by emptying everything and editing hard
Pick one block of time and do every drawer together. OXO's guide to organizing kitchen drawers recommends tipping the contents onto the counter in a single session, because that is when duplicates and triplicates show up. You will not see that you own four vegetable peelers while they are scattered across three drawers.
While the drawers are empty, wipe them out. Crumbs and sticky residue live in the corners, and a clean drawer is far more motivating to fill carefully.
Then sort what is on the counter. Real Homes suggests using a keep box and a review box so you are not forced to decide on every item at once. The review box is for things you are unsure about. If you have not reached for something by the time you have cooked a few weeks of meals, it goes.
Here is what typically leaves:
- Duplicates beyond what you actually use at once.
- Broken or warped tools, and gadgets with missing parts.
- Items that do not belong in the kitchen at all, such as batteries, tape, and takeout menus from three moves ago.
- Single-purpose gadgets you have not touched in a long time.
Real Homes also says to discard duplicates, broken tools and items not used for a long time, which matches how most professional organizers work. If you want more help drawing that line, our piece on minimalist home organization explains why declutter comes before organize.
Group by task, then assign each group a drawer
Once the keep pile is small, group it by what you do with it, not by what it looks like. Good Housekeeping's March 2026 testing guide recommends pulling items out, grouping them by type or function, and only then choosing organizers once the intended layout is clear. That order saves money and returns.
A useful set of groups for most kitchens:
- Eating: flatware, serving spoons, chopsticks, napkin rings.
- Stirring and flipping: spatulas, wooden spoons, tongs, ladles, whisks.
- Cutting and prep: knives, peelers, graters, scissors, measuring cups and spoons.
- Wraps and bags: foil, plastic wrap, parchment, storage bags.
- Baking: rolling pin, cutters, piping tips, thermometers.
- Spices and seasonings.
- Everyday odds and ends: can opener, bottle opener, corkscrew, lighters.
Match each group to a work zone
The rule of thumb that holds up across the advice we see: things used most belong closest to your natural reach. A Food & Wine testing guide frames it by use rather than appearance, with silverware near the route to the dining area and spatulas and tongs beside the stove.
In practice, that looks like this:
| Drawer position | What to store | Why |
|---|---|---|
| Top drawer nearest the stove | Spatulas, tongs, wooden spoons, ladles | Grabbed mid-cooking with one hand |
| Top drawer nearest the dishwasher or table path | Flatware, serving spoons | Short trip from unloading to setting the table |
| Top drawer near the prep counter | Knives in a tray, peelers, measuring tools | Used at the cutting board |
| Middle drawers | Wraps, foil, bags, baking tools | Used often, but not every meal |
| Deep bottom drawers | Pots, mixing bowls, small appliances | Heavy, bulky, used less often |
Real Homes also advises placing frequently used items toward the front or in top drawers and using smaller containers for small loose things. If your kitchen has an unusual layout, such as an island with drawers on both sides, apply the same logic to each work area. Our guide to organizing a luxury kitchen as architecture goes deeper on zones and clearances for larger kitchens.
Utensil drawer organization
The utensil drawer is where most kitchens fall apart, because it holds many odd shapes. Loose tools tangle, slide forward every time you close the drawer, and bury the one thing you need.
Two approaches work:
- By length. The Spruce Eats' updated guide recommends grouping cooking utensils by similar length, such as ladles with long-handled spoons. Tools of the same length sit flat together and the drawer closes cleanly.
- By function. When you have several compartments, give each a job: one for spatulas, one for spoons, one for whisks and tongs. IKEA's US guide suggests dedicated divider zones for whisks, spatulas and serving spoons.
Keep the drawer minimal. The Spruce recommends keeping drawers sparse, labeling sections such as tongs, spatulas, spoons and measuring cups, and avoiding stacking pots and pans in them. If a tool needs to be dug out from under three others, the drawer is overfull.
For knives, use a dedicated tray or block insert so blades stay secure and protected. Never leave them loose among other tools. The same IKEA guide recommends knife trays for exactly that reason.

A small trick for nesting items: measuring cups and spoons that nest, and nesting bowls, take up a fraction of the space. The Spruce Eats notes that nesting bowls that fit inside one another are a good way to organize a section.
Spice drawer organization
A spice drawer is one of the best ideas in kitchen storage, if it is set up properly. Jars lying flat in a drawer tilt, roll and hide their labels, so the layout matters.
What works:
- Lay them out in a horizontal organizer. OXO recommends a horizontal spice-drawer organizer so jar labels stay visible. Labels on lids work well too, if your jars are the same size.
- Use an angled or tiered insert in a deep drawer so you can see the back row.
- Decant bulk spices into airtight containers, which OXO also suggests. This frees space and keeps flavor from fading in oversized bags.
- Sort by how you cook, not alphabetically. Baking spices together, everyday savory spices at the front, rarely used blends at the back.
Before you refill the drawer, check what you actually have. Spices you cannot identify, or ones that have lost their smell, are candidates for the review box. Then place the drawer within a step of the stove, not across the kitchen. If you have no drawer to spare there, a shallow insert in a top drawer can hold your ten most used jars, with the rest in a cabinet or the pantry. Our post on deep pantry organization covers that overflow.
Wraps and baking paper can share the same logic. IKEA recommends drawer inserts for spices, baking paper, plastic wrap and foil, so boxes stand upright and you can see what is left.
Deep drawers: divide lengthwise and watch the weight
Deep drawers invite stacking, and stacking is how things get lost. Food & Wine's guide advises dividing deep drawers lengthwise and spreading weight across the drawer. The same guide notes that heavy ceramic dishes can make a drawer hard to open and close, so distribute the load rather than putting every heavy piece at one end.
A workable plan for a deep lower drawer:
- Place the heaviest items, such as cast iron or a stand mixer's attachments, toward the center or evenly side by side.
- Store bowls and lids vertically in dividers so each is visible.
- Keep small appliances in the drawer closest to where they are used. OXO suggests reserving deep lower drawers for larger items and small appliances, and not overfilling them.
- Leave an inch or two of free space so the drawer never jams.
Spruce's tip about clear compartments of varying sizes helps here too, since you can see the contents without lifting out the bins.
The kitchen junk drawer
Every kitchen has one. The goal is not to eliminate it but to give it rules.
Food & Wine's guide recommends moving items that are not used in the kitchen to where they are actually used, keeping cords wrapped, and storing pushpins in individual containers. Here is a reasonable plan:
- Empty it completely and sort into kitchen items and everything else.
- Relocate the rest. Tools go to the garage, chargers to the office, stationery to a desk. Our home office organization guide helps if the paper overflow needs its own home.
- Contain what remains. Small bins for tape, rubber bands, batteries, keys and takeout chopsticks.
- Limit the size. One drawer. If it overflows, the answer is another edit, not another drawer.
Label the bins. Labeling feels fussy until the second person in your household puts something back in the right place.
Choosing organizers that fit
Only shop once the layout is on paper. Then measure the inside of each drawer: width, depth and height, at the narrowest point. Handles, rails and slides can make the usable space smaller than the front suggests.
Good Housekeeping's testing says organizer choice should follow the drawer's dimensions and whether you need a one-piece tray or customizable components. Its testing perspective is useful: customization matters most for unusually sized drawers or specialized gadgets, while one-piece organizers suit standard flatware drawers.
Some simple guidance:
- Standard flatware drawer: a one-piece tray is fine and looks neat.
- Odd sizes, extra-wide drawers or a mix of tools: adjustable dividers let you reconfigure as your collection changes.
- Items that slide: the Spruce Eats says dividers or differently sized bins help stop things shifting in deep drawers.
- Cheap liners: a non-slip liner under any insert stops it creeping forward every time the drawer closes.
- Material: choose what matches your kitchen. Wood, bamboo, metal or clear acrylic can all work. Clear sections have the advantage of visibility.
Do not buy a large set of containers "just in case." Buy for the layout you drew, then return or skip anything extra.
How to keep drawers organized
A layout holds when it is easy to follow and easy to reset. A few habits make that happen:
- Put back, do not toss in. The sorted drawer only takes seconds to maintain if each item has an obvious home.
- One in, one out. When a new spatula arrives, an old one leaves.
- Do a quick reset every season, or whenever you notice one section overflowing.
- Keep everyone in the loop. If family members load the dishwasher, show them where flatware and tools go, or label the sections.
If the kitchen is also part of a move, edit the drawers before you pack. You will pack less, unpack faster and arrive with a layout rather than a pile.
Our perspective
Drawers are where a kitchen's real habits show. A client's cabinets can look beautiful from the doorway, but open the top drawer and you see how the household really cooks, hosts and rushes in the morning. That is why we never start with a product list. We start with how you move through the space, then build a system around it.
We design every project to be both functional and good-looking, because a drawer that looks perfect on day one but does not fit your routine will not stay organized for long. Our approach is personalized and detail-oriented, and we aim for lasting systems that your whole household can maintain, with minimal disruption to your days while we work.
If the idea of emptying every drawer on a free Saturday sounds like a project you would rather hand off, that is the kind of work we do in homes across San Antonio.
Steve
Let us handle the kitchen for you
If you would rather skip the sorting, measuring and trial and error, our team designs and sets up kitchen systems for San Antonio homeowners. We edit with you, map zones around how you cook, and build a layout that looks as good as it works. See how luxury home organizing works with us.

Moving soon? Our moving management concierge service covers packing, unpacking and setting up your new kitchen, so drawers are ready for use when the boxes are gone.
FAQ
How do I organize my kitchen drawers from scratch?
Empty every drawer onto the counter, clean them, and remove duplicates, broken items and things you do not use. Group what is left by task, assign each group to the drawer nearest where you use it, and only then buy organizers that fit your measurements.
What should go in each kitchen drawer?
Put flatware near the route to the dining area, spatulas and tongs beside the stove, and knives in a secure tray near your prep space. Wraps, foil and spices work well in drawer inserts, while deep lower drawers suit heavier items and small appliances.
What is the best way to organize a spice drawer?
Store jars in a horizontal or angled insert so every label is visible, and place the drawer close to the stove. Decant bulk spices into airtight containers, and keep only the ones you actually use within easy reach.
How do I organize a junk drawer so it stays tidy?
Empty it, move non-kitchen items to where they belong, and sort what remains into small labeled containers. Keep cords wrapped and small items like pushpins in their own containers, and cap the junk drawer at one.
Sources
- How to Organize Kitchen Drawers: Deep Drawers, Utensils (OXO)
- 6 Best Kitchen Drawer Organizers & Dividers (Good Housekeeping)
- How to organize kitchen drawers (Real Homes)
- Best Kitchen Drawer Organizers, Tested & Reviewed (Food & Wine)
- The 9 Best Kitchen Drawer Organizers (The Spruce Eats)
- 20 Clever Ways to Organize Crowded Kitchen Drawers (The Spruce)
- How to organize kitchen cabinets and drawers: 8 Ideas (IKEA US)